How can we help you?
Here in our Help Center you will find all general answers to questions about billing, admin panel, product and much more.
Dashboard
The dashboard shows the posts and all relevant information of your platform.
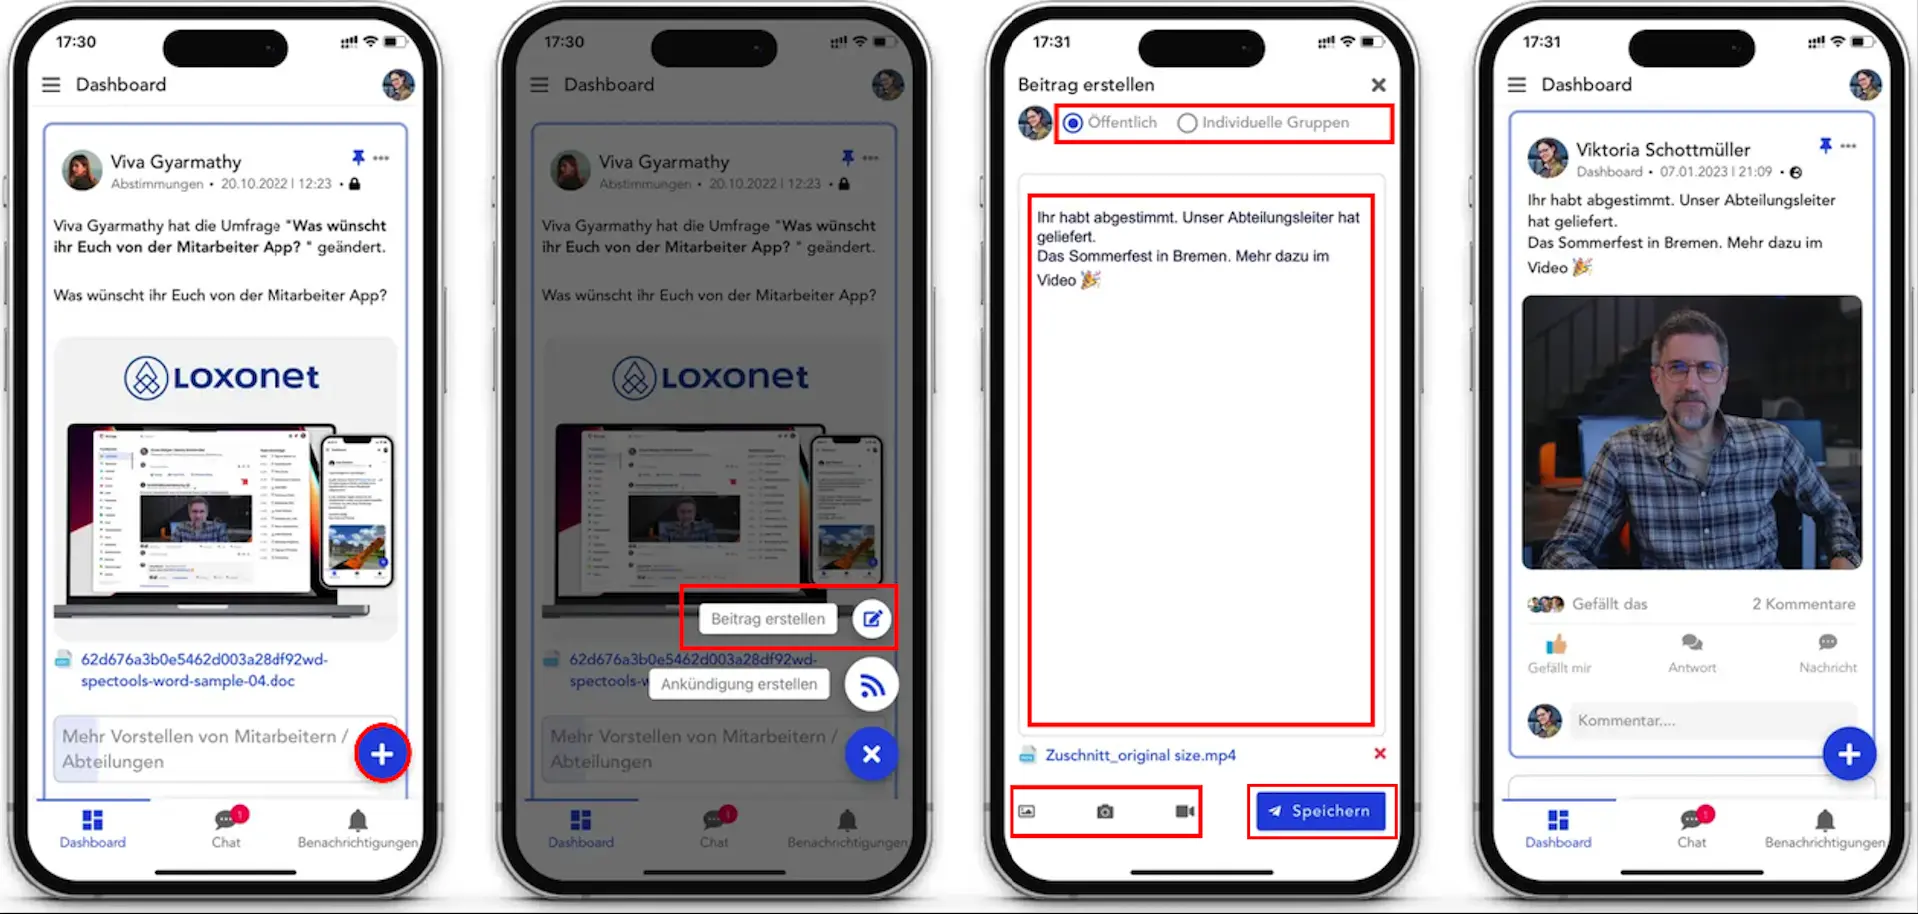
Creation of a post
Creating a post is easy.
- On the dashboard, click the plus sign .
- In the menu that appears, click Create Post .
- Now you need to choose who should see your post. Choose Public if you want everyone to be able to see your post. Choose Individual Groups if you only want your post to be visible to certain user groups.
* If you selected Individual groups , in the window that appears, select the desired groups → Confirm your choice by clicking the Select button .
- Add the content of your post.
- Optionally, you can add media files to your post.
- Now that your post has been prepared for publication, just click Save .
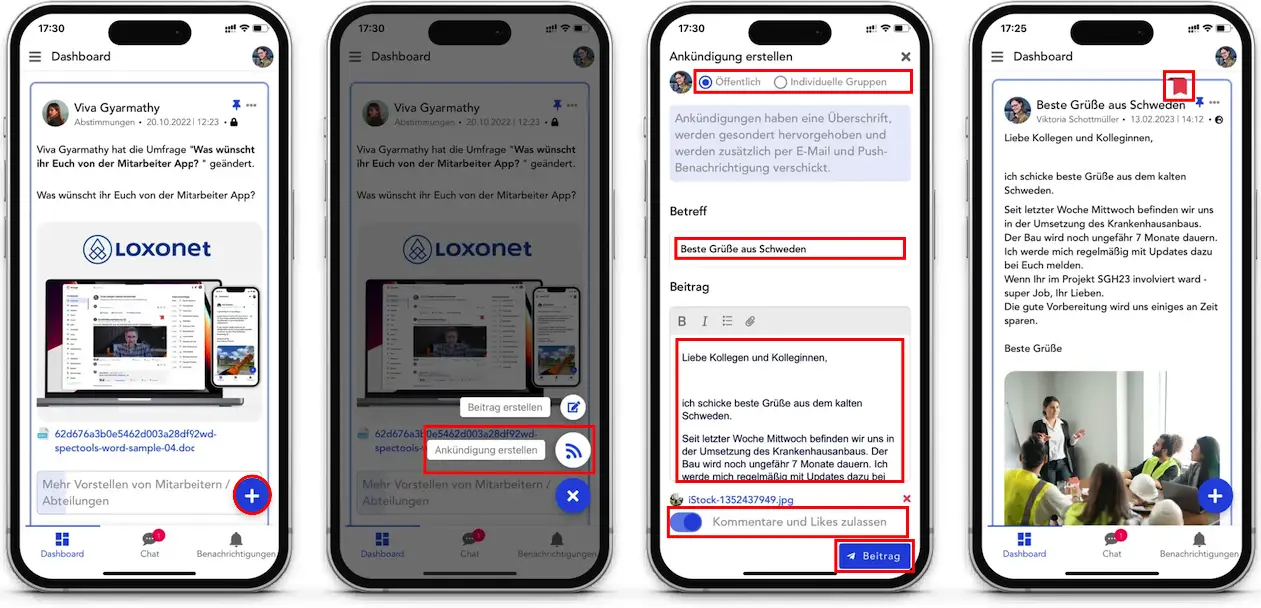
Creating an Announcement
You can also create an announcement. An announcement differs from a regular post in that the announcement has a red badge to indicate that the post is an announcement. Announcements have a title. There is an option to disable comments. Also, please note that you can send emails while saving your announcement.
- On the dashboard, click the plus sign .
- In the menu that appears, click Create Announcement .
- Now you need to choose who should see your announcement. Select Public if you want everyone to be able to see your announcement. Choose Individual Groups if you only want your announcement to be visible to certain user groups.
* If you selected Individual groups , in the window that appears, select the desired groups → Confirm your choice by clicking the Select button .
- Add the content of your announcement.
- Optionally, you can add media files to your announcement.
- Also disable the comment function for the announcement if necessary.
- Now that your announcement has been prepared for publication, click Post .
- In the window that appears, click Save & Email if you want users to receive email notifications. If no emails are needed, just click Save Post .
* Please note that it is only possible to send emails when the post is published.
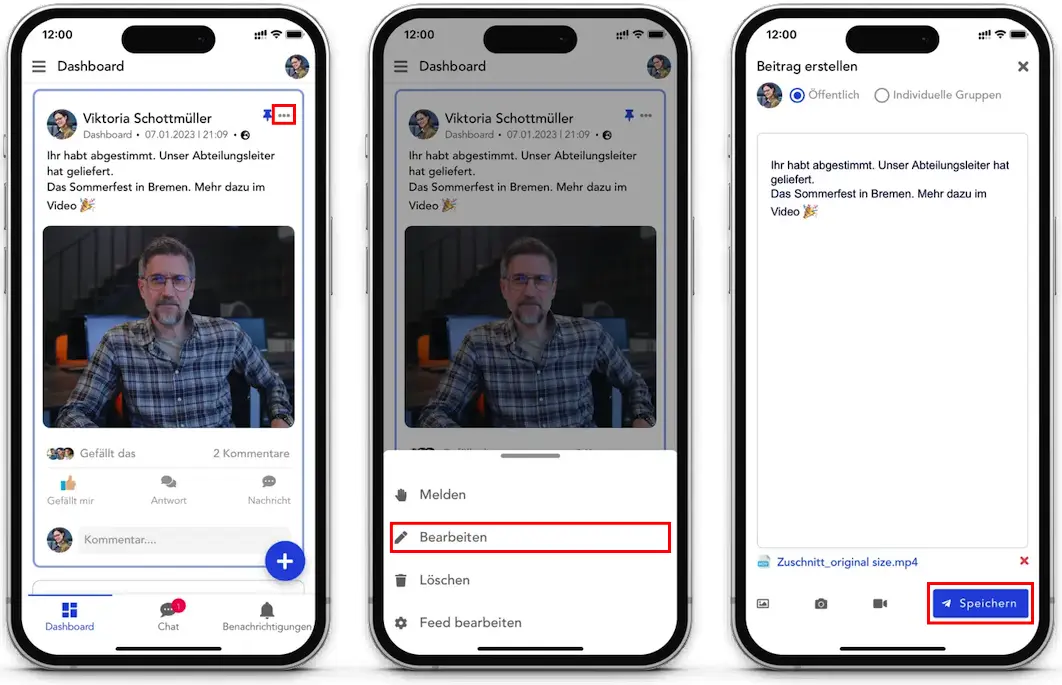
Edit post and announcement
To edit an already created post or announcement:
- Click on the three dots in the top right corner of the post.
- Click Edit .
- Edit the content of your post.
- Save your changes.
* Note that only the creator of the post or a user with admin rights can edit the post. Otherwise the editing option is not available.
pin post
It is possible to pin entries on the dashboard. The pinned entries are always displayed at the top.
- Click on the three dots in the top right corner of the post.
- Click Pin .
* Only users with administrator rights can pin entries on the dashboard.
* The maximum number of pinned entries is limited.
To remove the post from above:
- Click on the three dots in the top right corner of the post.
- Click Remove from Above .
Deletion of an entry
To delete the post:
- Click on the three dots in the top right corner of the post.
- Click Delete .
* A post can only be deleted by the creator of the post or by a user with admin rights.
Report a post or announcement
If you think the content of a post is inappropriate, you can report the post.
- Click on the three dots in the top right corner of the post.
- Click Report .
- Fill out the form to describe your complaint.
- Click Report .
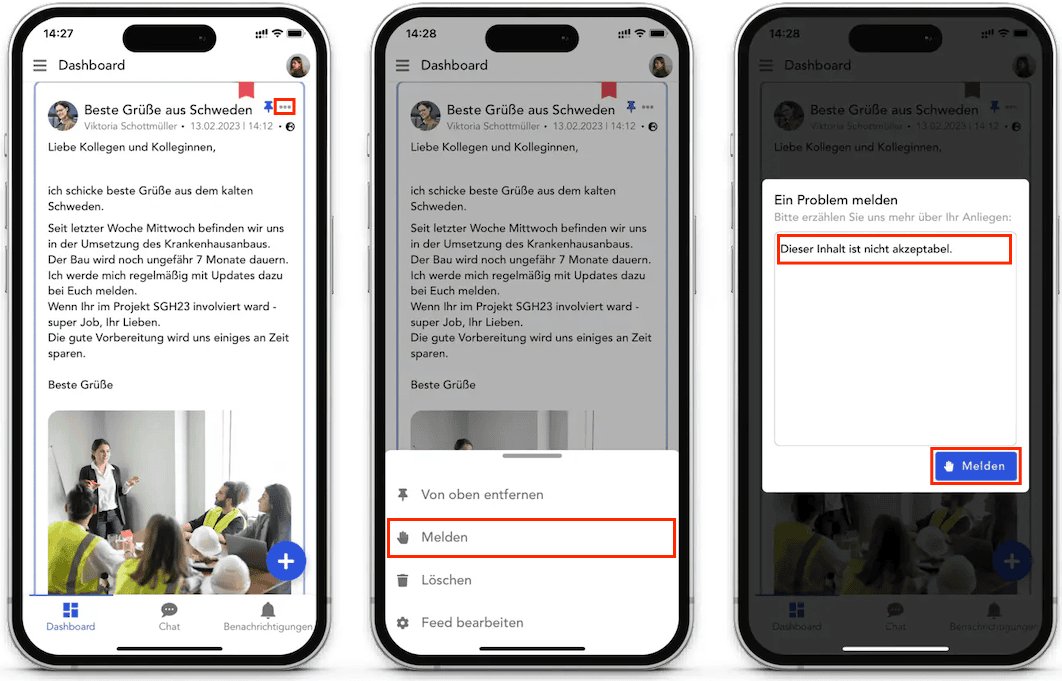
Administrators will then be notified of your complaint and given the opportunity to investigate and respond.
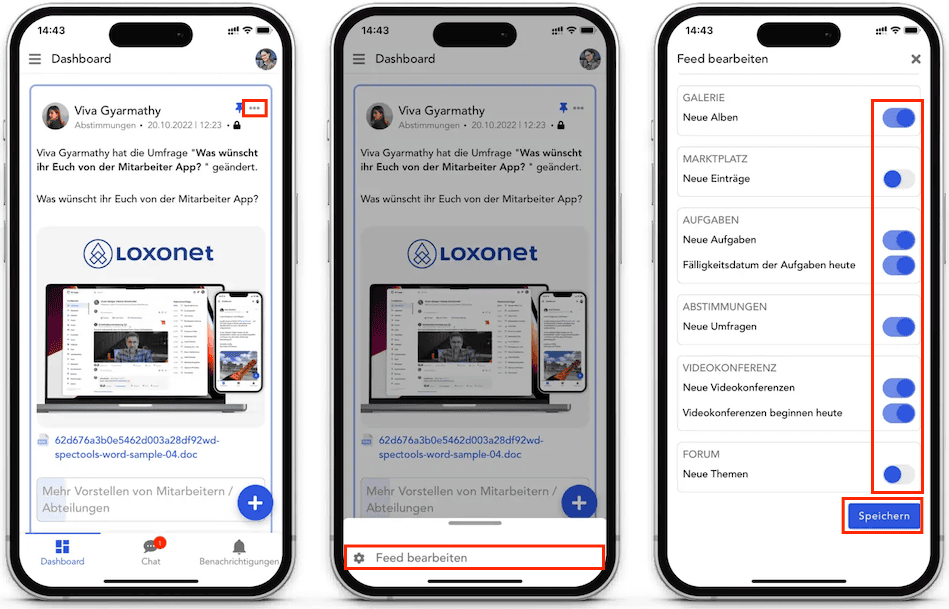
Edit feed
If you want to disable or enable dashboard entries for a feature:
- Click on the three dots in the top right corner of the post.
- Click Edit Feed .
- Please adjust the options in the window that appears.
- Click Save .