How can we help you?
Here in our Help Center you will find all general answers to questions about billing, admin panel, product and much more.
Administration / Admin Panel
/System settings
/Changing the Loxonet subdomain to a custom subdomain
Introduction
Changing Loxonet's subdomain to your own custom subdomain is an important step towards personalization and greater integration of your brand. In this article we explain in detail how to perform this operation. Follow the steps below to successfully complete the transition.
Step 1: Call up the administration area
- Open the administration area of your platform.
- Navigate to " System Settings ".
Step 2: "Domain" tab
- In the " System settings " you will find the " Domain " tab - select it.
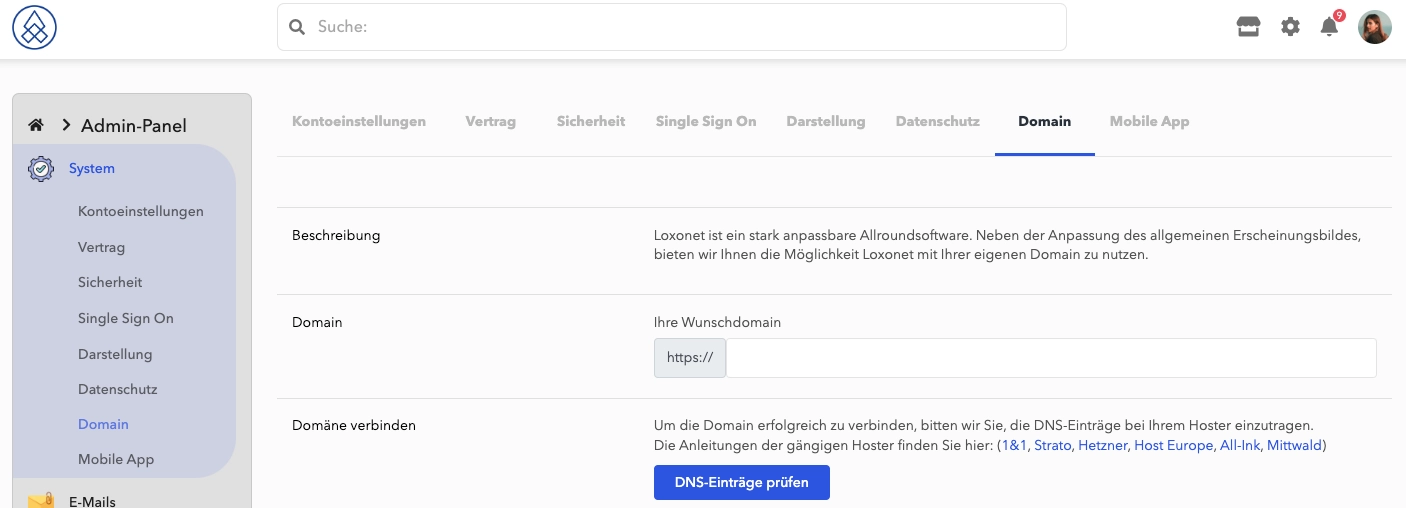
Step 3: Enter the new domain
- Enter the desired domain for your platform in the " Your desired domain " field.
Step 4: Domain Registration
- Register the new domain with your chosen hosting provider. To do this, follow the instructions of your hosting service provider.
Step 5: Adjustment of DNS entries
- Go to the hosting settings and find the DNS records section.
- Follow the instructions in the Join Domain section of the Domain tab in the admin panel.
- Make appropriate changes to the DNS records according to the instructions provided.
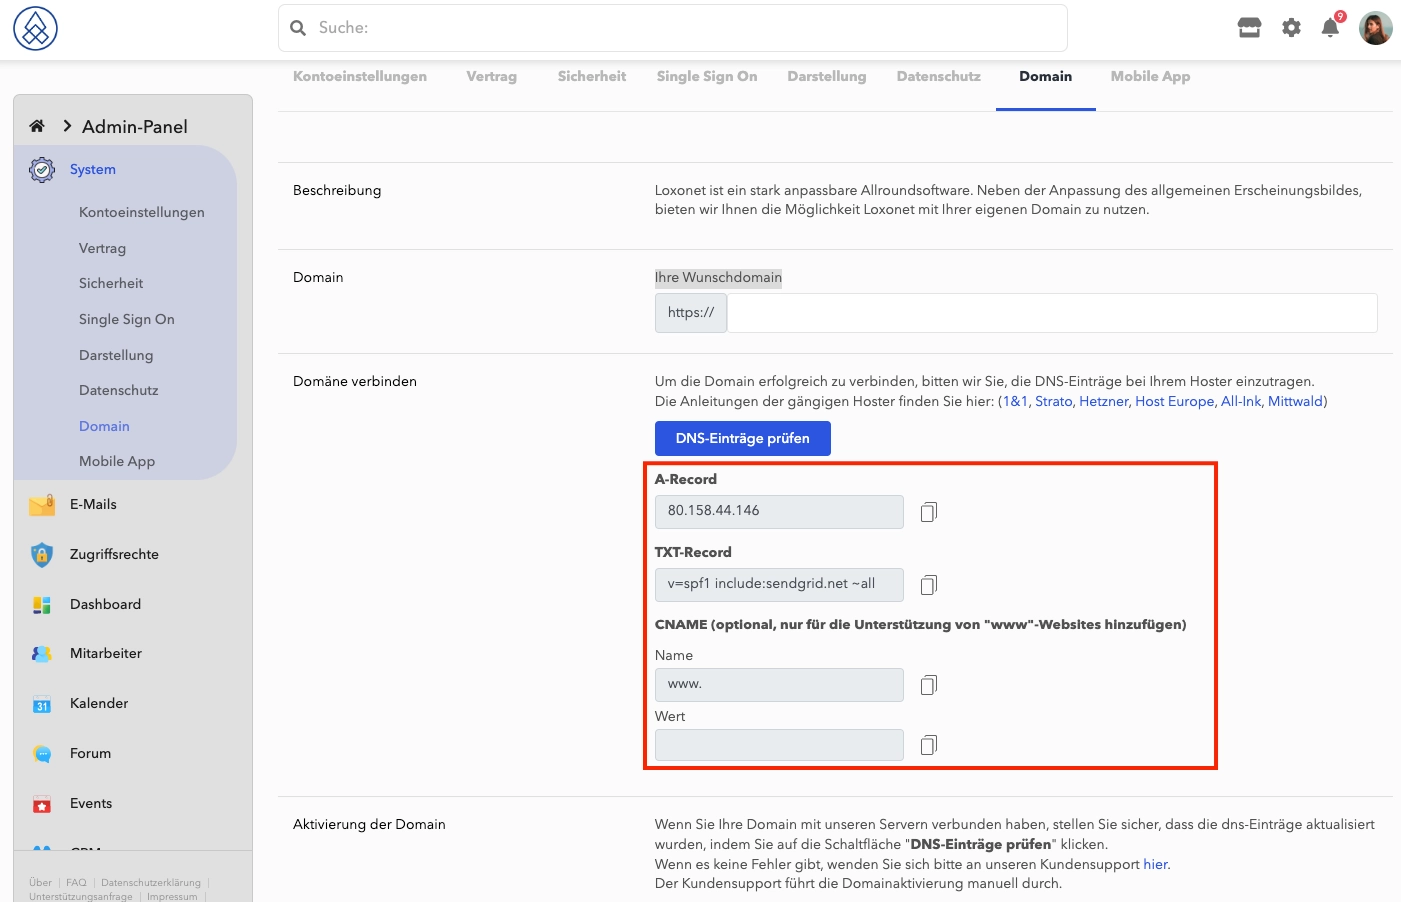
Step 6: Check DNS record
- After making the changes, wait a while to ensure the DNS records have been updated.
- Check the DNS records to make sure they are configured correctly.
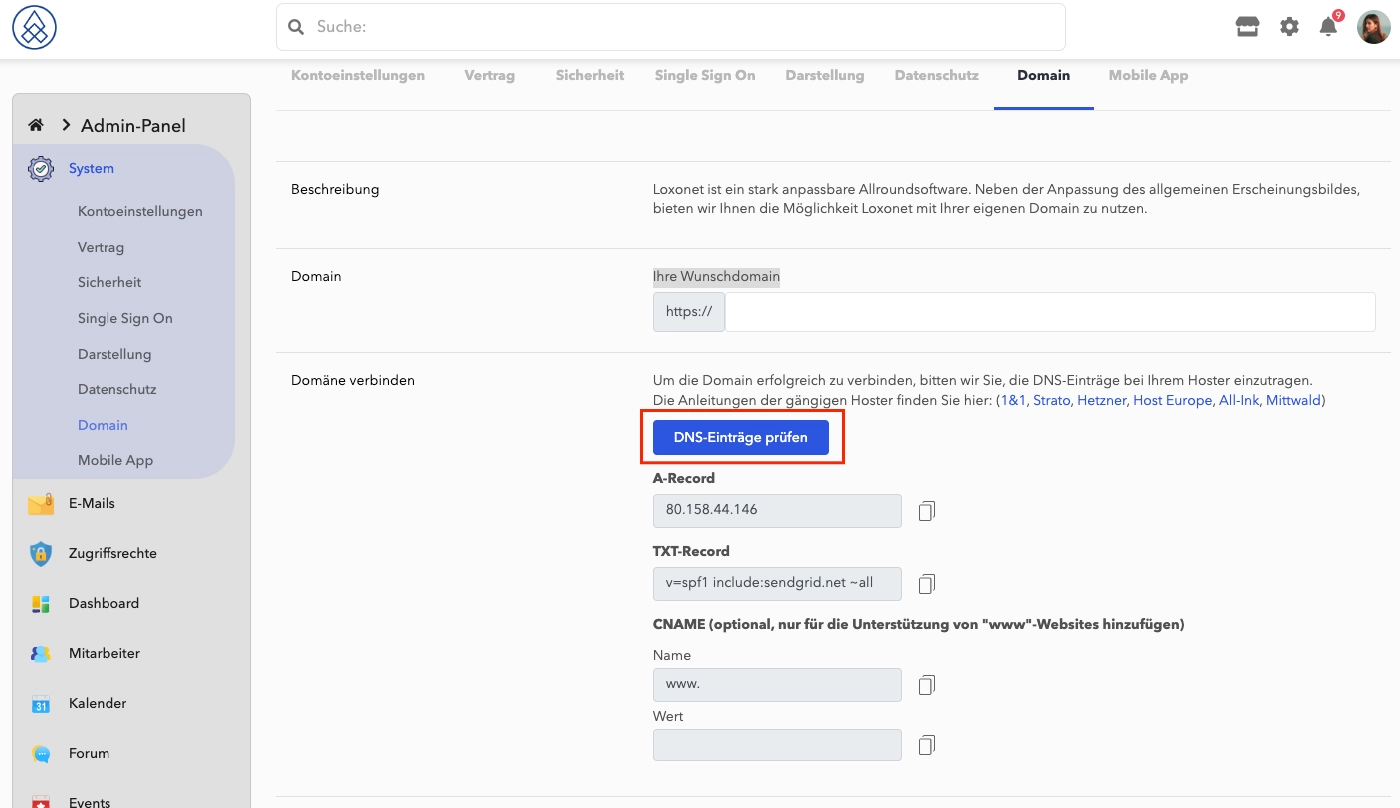
Step 7: Save changes
- If the DNS records check was successful, return to the administration panel.
- Click " Save " to confirm the changes made.
Diploma
In case there were no errors during the process, please write to us in the support chat . Our team will process your request and within 24 hours your platform will be switched to the new domain.