
How can we help you?
Here in our Help Center you will find all general answers to questions about billing, admin panel, product and much more.
This guide will help you configure Single Sign-On (SSO) using Microsoft Entra ID (formerly Azure Active Directory) for your Loxonet intranet access.
Prerequisites
Access to Microsoft Entra ID (Admin role) Admin access to your Loxonet environment
Loxonet SSO metadata:
- Entity ID: https://api.loxonet.com/v1/sso/metadata
- ACS URL: https://api.loxonet.com/v1/sso/acs
- SLS URL: https://api.loxonet.com/v1/sso/sls
- Your custom Loxonet domain (e.g., https://your-domain.loxonet.com)
1. Configure Microsoft Entra ID
Step 1: Create a New Enterprise Application
- Go to Entra ID Admin Center
- Navigate to Enterprise Applications > New Application
- Click Create your own application
- Enter a name like Loxonet SSO
- Choose Integrate any other application you do not find in the gallery
- Click Create
Step 2: Configure SAML SSO
- After creation, go to Single Sign-On > Choose SAML
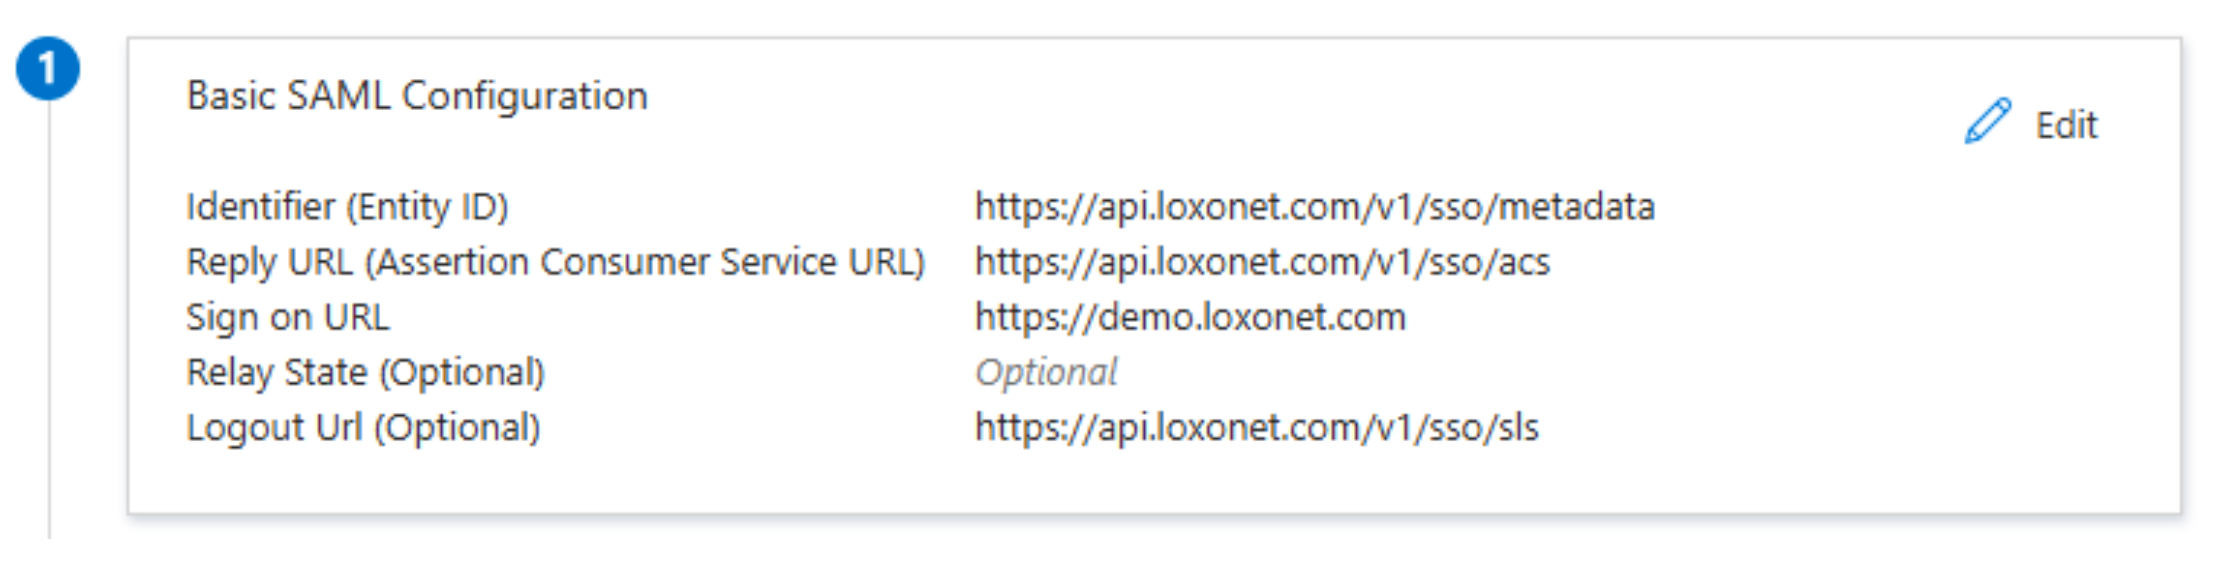
- In Basic SAML Configuration:
| Field | Value |
|---|---|
| Identifier (Entity ID) | https://api.loxonet.com/v1/sso/metadata |
| Reply URL (ACS) | https://api.loxonet.com/v1/sso/acs |
| Sign-on URL | https://your-subdomain.loxonet.com |
| Logout URL | https://api.loxonet.com/v1/sso/sls |
Step 3: Set Attributes & Claims
- In your Entra ID Enterprise Application > Single Sign-On > SAML section
- Scroll to Attributes & Claims
- Click Edit and set the following exactly:
Required Claim:
| Claim Name | Type | Value |
|---|---|---|
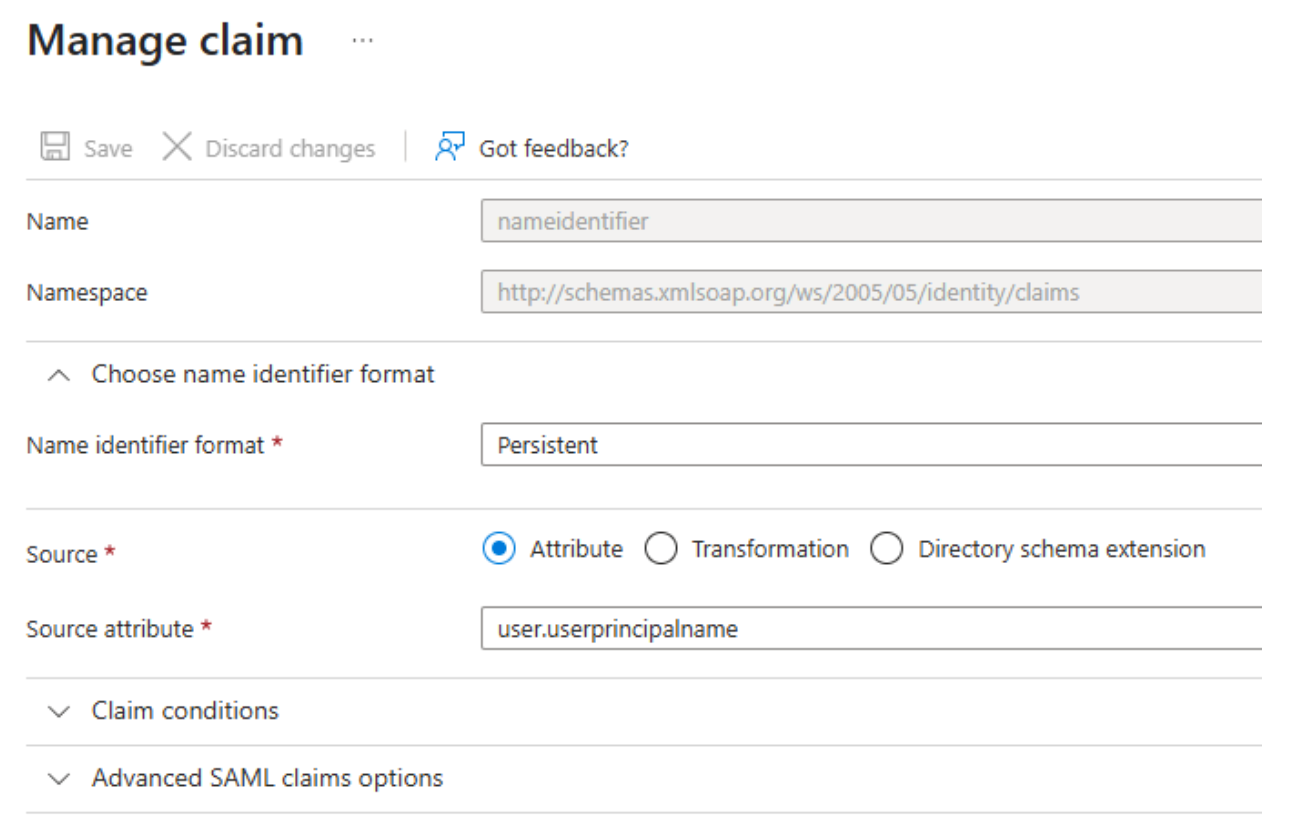
| Unique User Identifier (Name ID) | SAML | user.userprincipalname |
→ Format: Persistent (nameid-format:persistent)
This is used as the SAML NameID — it is how Loxonet uniquely identifies the user logging in.
- See the attached image for how to set the Additional Claims:
Additional Claims:
| Claim Name | Type | Value |
|---|---|---|
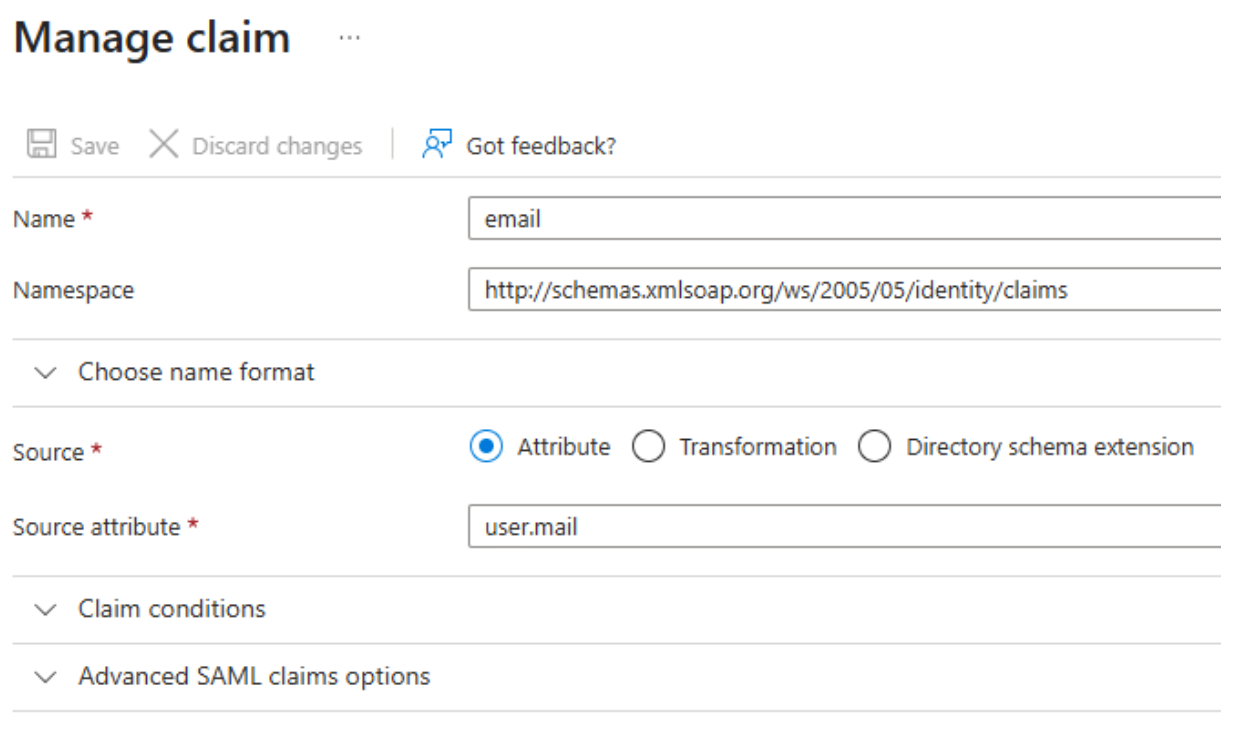
http://schemas.xmlsoap.org/ws/2005/05/identity/claims/email | SAML | user.mail |
http://schemas.xmlsoap.org/ws/2005/05/identity/claims/givenname | SAML | user.givenname |
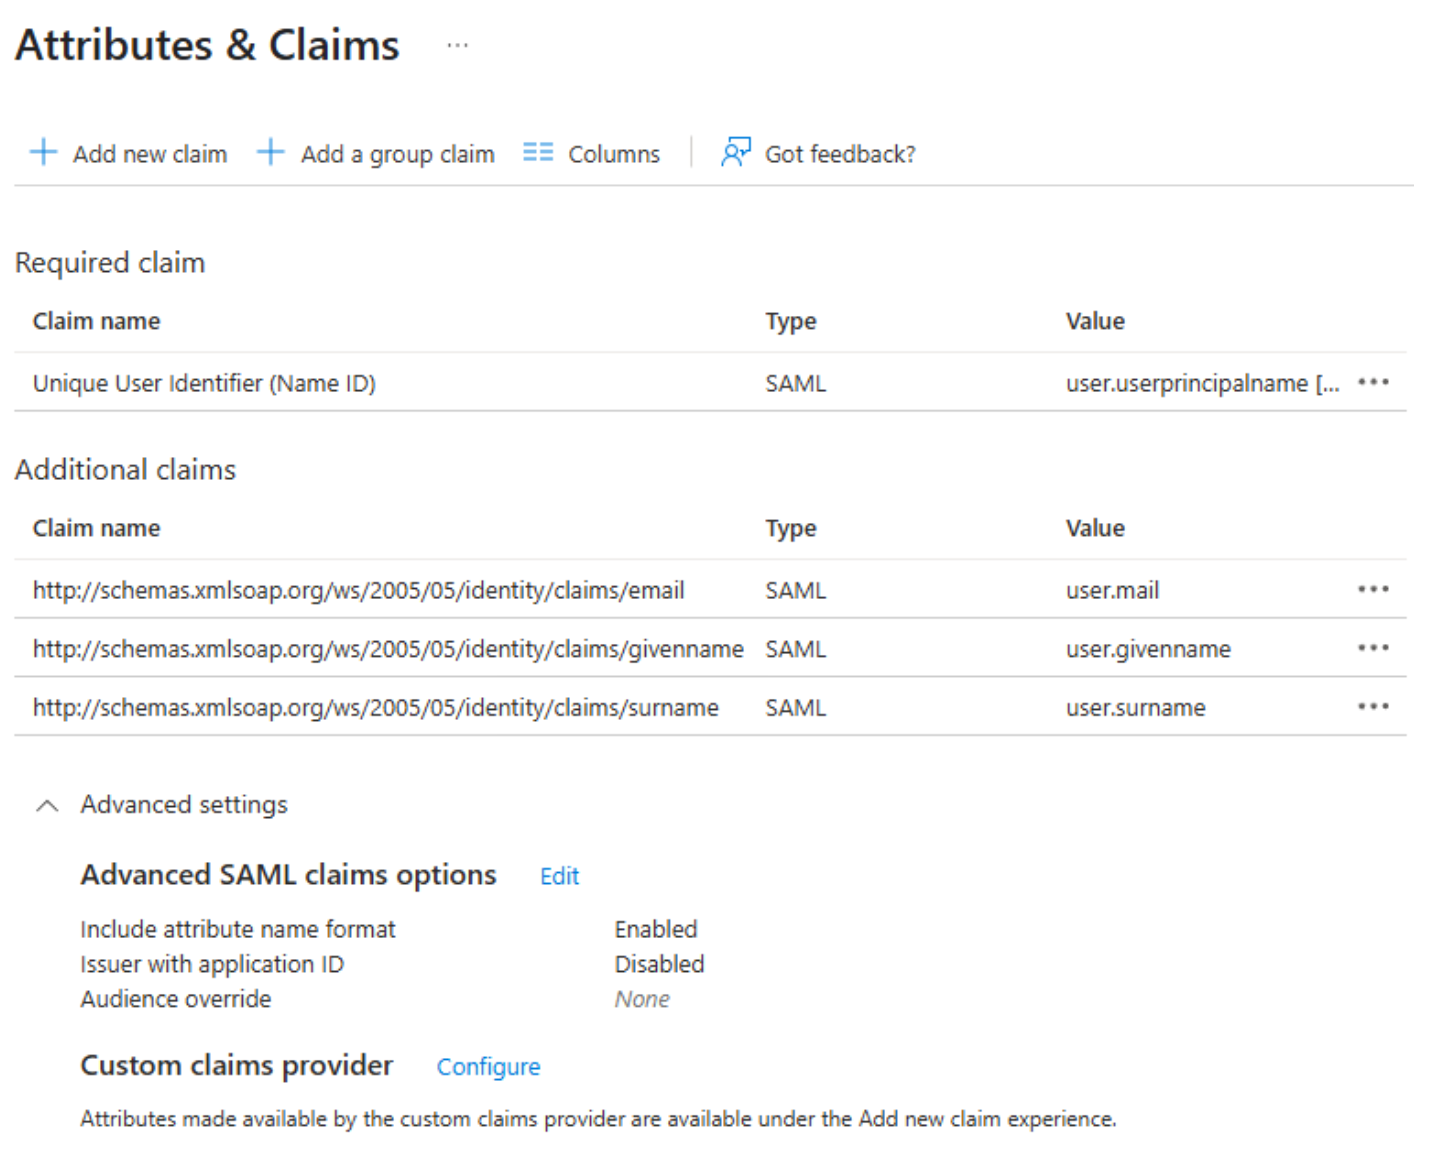
http://schemas.xmlsoap.org/ws/2005/05/identity/claims/surname | SAML | user.surname |
- See the attached image for how to set the Additional Claims:
- Please refer to the attached images to see how your Attributes and Claims section should appear after configuration:
Step 4: Download Certificate & Metadata
- Download the Base64 SAML Signing Certificate
- Copy the App Federation Metadata URL
Step 5: Enable SAML Response and Assertion Signing
- Go to your Entra ID application’s Single Sign-On > SAML page
- Scroll down to SAML Signing Certificate
- Click on Edit for the SAML Signing Settings
- In the modal dialog, ensure the following options are selected:
o Signing Option: Sign SAML response and assertion
o Signing Algorithm: SHA-256
- Save the settings
- Please refer to the attached images to see how SAML Signing Certificate section should appear
after configuration:

2. Configure Loxonet SSO
Step 1: Open SSO Settings
- Go to your Loxonet Admin Dashboard
- Navigate to Settings > SSO (Single Sign-On)
Step 2: Fill in Identity Provider (IdP) Settings
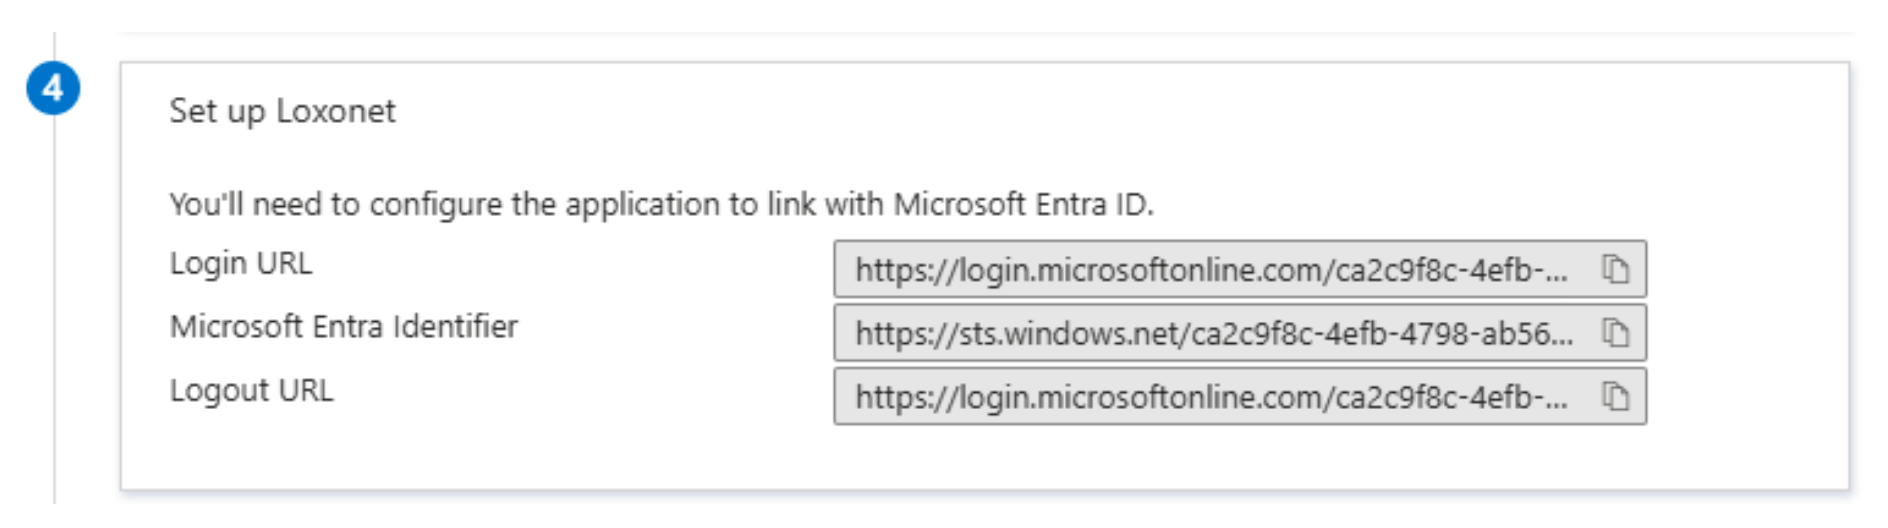
- You can find these details in Microsoft Entra ID > Enterprise Applications > Your App > Single
Sign-On > SAML, under the SAML Certificates section.
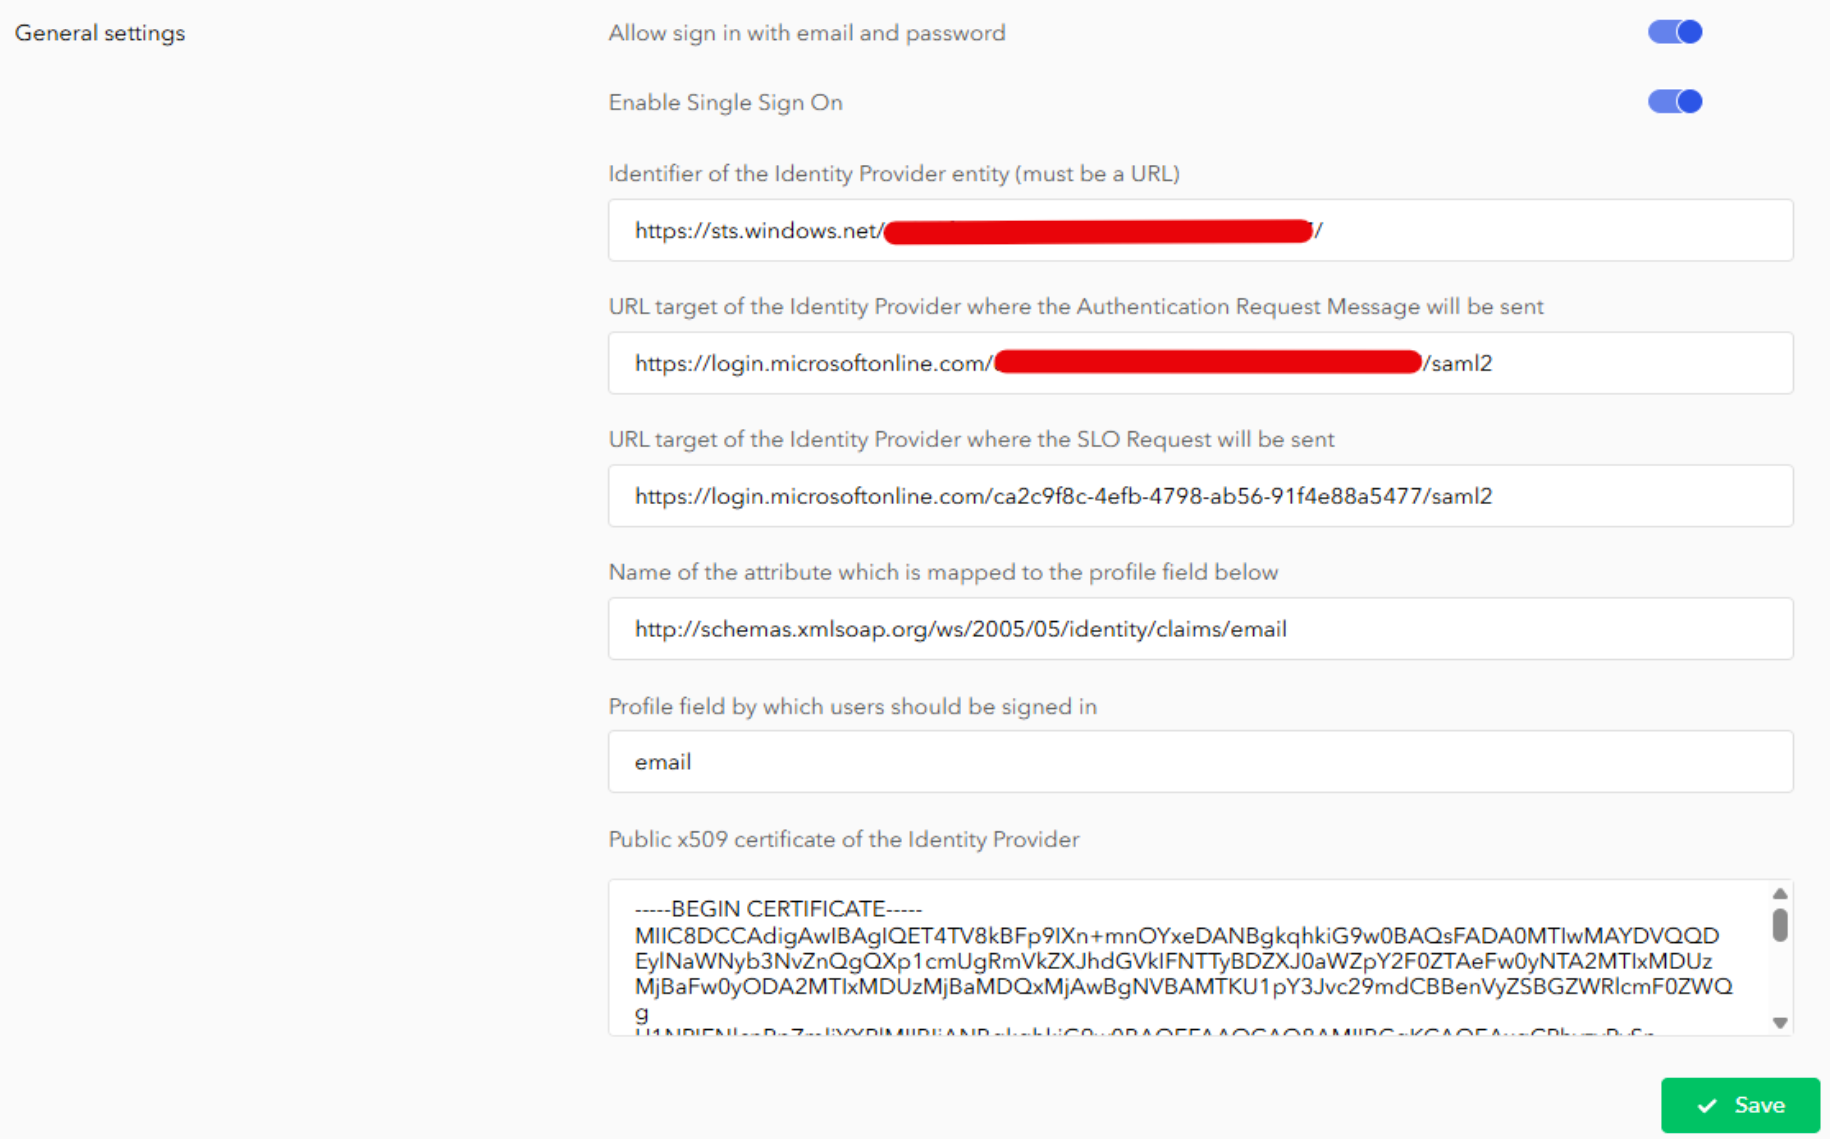
| Field | Value from Entra ID |
|---|---|
| IdP Entity ID | https://sts.windows.net/<Directory-ID>/ |
| SSO Target URL (Login) | https://login.microsoftonline.com/<Directory-ID>/saml2 |
| SSO Target URL (Logout) | https://login.microsoftonline.com/<Directory-ID>/saml2 |
| Attribute Name | http://schemas.xmlsoap.org/ws/2005/05/identity/claims/email |
| Profile Field | email |
| Public Certificate | Paste PEM contents of downloaded certificate |
- Refer to the attached image to see how your IdP details appear in Entra ID. You can copy the values from it:
- This is how the Single Sign-On section looks under Loxonet App > Admin Panel > Settings:
Step 3: Save and Test
- Click Save
- Go to your custom Loxonet URL and click Sign in with SSO